Mr. Scott wonders why I'm spending my day off writing about "work," but I just can't help myself.
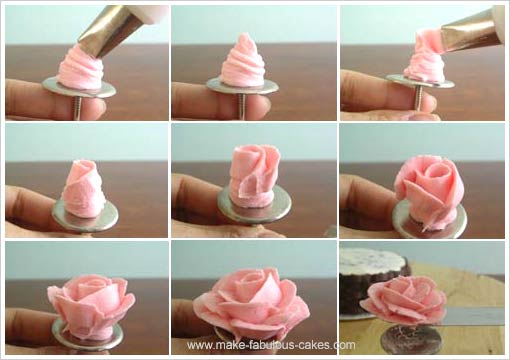
As I mentioned before, buttercream flowers are a new challenge for me. Previous to now, I had only been shown how to pipe roses. My roses these days are passable, but show room for improvement. The trick is having really stiff buttercream to work with (Add powdered sugar. A lot.) I found this little image of how they are piped using a "nail", since trying to explain the nail concept to my mother was difficult ("It's a stick with a flat thingy on top...") The majority of flowers are piped first onto the nail and then transferred to the cake with small scissors or a spatula (I use scissors). The stiffer the flower is, the better it holds its shape, the easier the transfer.
You can also pipe flowers using Royal Icing and allowing them to dry before transferring. This is a variation I would like to look into more down the road.
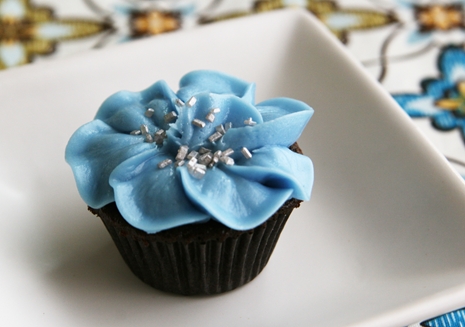
In researching piping , I've found a multitude of flower varieties that can be created from frosting. It blows my mind how one slanted tip (#104) can create so many flowers! Its all about pressure and angles. Check these out:
Carnation


Hibiscus


Iris

Wild Rose
Pansy

Daisy

These are other flowers that use special tips:

Bachelor Button

Chrysanthemum
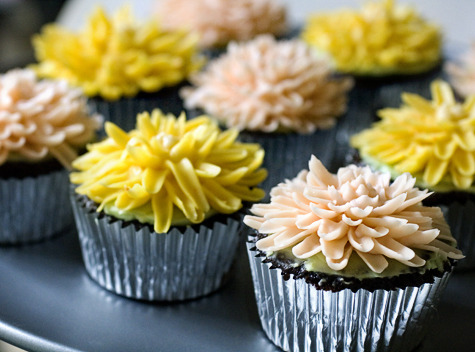
Shaggy Mum

Drop flowers

Lily of the Valley

Here are some recent cakes I've done with flowers. Practice practice practice, I say!


For floral cakes, I pipe the border and stems first as a guide to how I want the design to flow and fill the space. The largest flowers are placed first and create the focal point of the spray. Leaves and small flowers fill in and cover any flaws, then I write the message.
Did I mention all of this intricate piping has caused my carpel tunnel flair up again? Wonderful perk of the job...wearing a wrist brace for a couple hours a day is helping slightly.
The sun is shining outside, so I'm going to go catch it for a few hours and sketch ideas for Mallory's wedding cake!
xoxo,
Rachel
Pin It


