Wow. So I'm still reeling in the idea that I'm going to compete LIVE at The Mall of America in less than one month (October 14th). Here are some of the deets:
Round 1: Halloween Birthday Cake
- One carved cake plus 24 coordinating cupcakes
- Must be completed in 1.5 hours
- One-person teams
- $500 for 1st place
Round 2: Wedding Cake
- Must be at least five tiers
- Must be completed in 3 hours and moved to display table intact
- Two-person teams (Yay Rheanna!!!)
- Design must be based on the imaginary couple profile provided: A fall, outdoor wedding with vintage and Scrabble elements, orange and taupe color scheme
- $1000 for the first place team
The competition is hosted and judged by The Upper Midwest Bakery Association. There is no refrigeration available, but we can have microwaves and mixers. Cakes and icing are made ahead of time. Neither round is judged on taste, nor will the cake be served to the audience, since we aren't working out of certified kitchens. That's right, we get a 6 ft. buffet table in the middle of the MALL. A four story mall, visited by millions of people each year, no less.
I have observed this particular competition for the past two years and waffled between "Do I do it?" and "This is absolute suicide." Let's face it: The conditions aren't great. BUT, it's a fantastic challenge, and I finally came to the conclusion I would regret it more if I didn't try. So here I go, competing in not one round but two, and live for the first time.
Rheanna will be my team member for the wedding round. We have worked together since February when I started my new job at The Queen of Cakes. She's a foot taller than me {who isn't}, quick to laugh, and full of energy. I'm so excited for her, as this is her first competition ever. She's only been decorating for about a year and half, and she impresses the heck out of me. I think we will make an awesome team!
Our co-worker, Angie, is also competing in the birthday round. Angie has a meticulous eye for detail and endless creativity. She will be big competition for me! But as long as Queen of Cakes is winning, I'm happy! I couldn't ask for a more supportive group of gals to work with. This will be an experience we never forget.
My strategy thus far is to go against the mold a little. Expect the unexpected!
xoxo,
Rachel
Showing posts with label birthday cakes. Show all posts
Showing posts with label birthday cakes. Show all posts
Tuesday, September 18, 2012


Wednesday, May 9, 2012
Is this a blog about cakes?
One of my loyal readers "complained" that I haven't been posting enough cakes on here. So, T**, this is for you :)
Just to give you an idea of how hard I have been working lately, I've upped my output to about 20-25 custom cakes in a 12 hour shift (Saturdays). On those days I could go through upwards of 10 gallons of buttercream. We are trying to hire another decorator to help with the ever-growing weekend load. Last week in total we did just shy of 160 custom orders. Even with the growing demand, I still LOVE what I'm doing, adore my coworkers and boss, and feel completely spoiled.
Not many wedding cakes yet, but those are starting to pick up as well as the season progresses. I will be taking more of those on once the new person is hired.
Until next time!
Cake and cats,
Rachel
Pin It
Just to give you an idea of how hard I have been working lately, I've upped my output to about 20-25 custom cakes in a 12 hour shift (Saturdays). On those days I could go through upwards of 10 gallons of buttercream. We are trying to hire another decorator to help with the ever-growing weekend load. Last week in total we did just shy of 160 custom orders. Even with the growing demand, I still LOVE what I'm doing, adore my coworkers and boss, and feel completely spoiled.
 |
| Fondant ladybug |
 |
| Reuben for Mr. Scott's birthday! |
 |
| Lab coat I've done three times now |
 |
| Isn't the tutu the cutest? |
 |
| High heel "Teeny" cakes |
 |
| Old school Mario |
 |
| These buttercream elephants were a challenge! |
 |
| Hello Kitty + Gumballs = Sweet |
 | |
| Ruby is a popular name I guess....pink chef hat! |
Until next time!
Cake and cats,
Rachel
Pin It
Sunday, March 25, 2012
Buttercream Flowers
Hello!
Mr. Scott wonders why I'm spending my day off writing about "work," but I just can't help myself.
As I mentioned before, buttercream flowers are a new challenge for me. Previous to now, I had only been shown how to pipe roses. My roses these days are passable, but show room for improvement. The trick is having really stiff buttercream to work with (Add powdered sugar. A lot.) I found this little image of how they are piped using a "nail", since trying to explain the nail concept to my mother was difficult ("It's a stick with a flat thingy on top...") The majority of flowers are piped first onto the nail and then transferred to the cake with small scissors or a spatula (I use scissors). The stiffer the flower is, the better it holds its shape, the easier the transfer.

In researching piping , I've found a multitude of flower varieties that can be created from frosting. It blows my mind how one slanted tip (#104) can create so many flowers! Its all about pressure and angles. Check these out:
Carnation
 Primroses (violets made with a drop flower tip)

Hibiscus
 Daffodil
 Orchid


Poinsettia


For floral cakes, I pipe the border and stems first as a guide to how I want the design to flow and fill the space. The largest flowers are placed first and create the focal point of the spray. Leaves and small flowers fill in and cover any flaws, then I write the message.
Did I mention all of this intricate piping has caused my carpel tunnel flair up again? Wonderful perk of the job...wearing a wrist brace for a couple hours a day is helping slightly.
The sun is shining outside, so I'm going to go catch it for a few hours and sketch ideas for Mallory's wedding cake!
xoxo,
Rachel
Pin It
Mr. Scott wonders why I'm spending my day off writing about "work," but I just can't help myself.
As I mentioned before, buttercream flowers are a new challenge for me. Previous to now, I had only been shown how to pipe roses. My roses these days are passable, but show room for improvement. The trick is having really stiff buttercream to work with (Add powdered sugar. A lot.) I found this little image of how they are piped using a "nail", since trying to explain the nail concept to my mother was difficult ("It's a stick with a flat thingy on top...") The majority of flowers are piped first onto the nail and then transferred to the cake with small scissors or a spatula (I use scissors). The stiffer the flower is, the better it holds its shape, the easier the transfer.
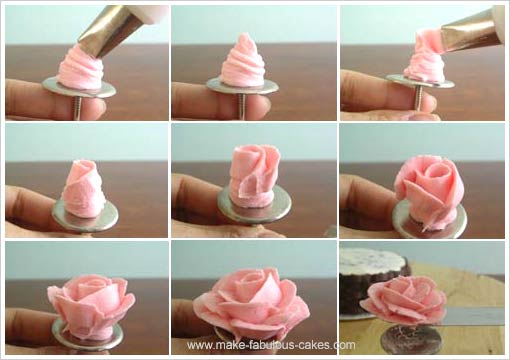
You can also pipe flowers using Royal Icing and allowing them to dry before transferring. This is a variation I would like to look into more down the road.
In researching piping , I've found a multitude of flower varieties that can be created from frosting. It blows my mind how one slanted tip (#104) can create so many flowers! Its all about pressure and angles. Check these out:
Carnation

Hibiscus


Iris

Wild Rose
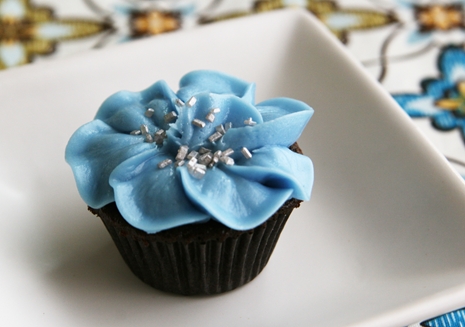
Pansy

Daisy

These are other flowers that use special tips:

Bachelor Button

Chrysanthemum
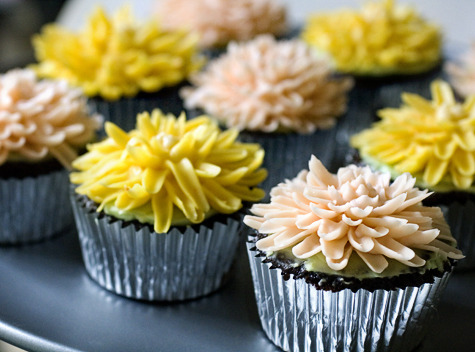
Shaggy Mum

Drop flowers

Lily of the Valley

Here are some recent cakes I've done with flowers. Practice practice practice, I say!
For floral cakes, I pipe the border and stems first as a guide to how I want the design to flow and fill the space. The largest flowers are placed first and create the focal point of the spray. Leaves and small flowers fill in and cover any flaws, then I write the message.
Did I mention all of this intricate piping has caused my carpel tunnel flair up again? Wonderful perk of the job...wearing a wrist brace for a couple hours a day is helping slightly.
The sun is shining outside, so I'm going to go catch it for a few hours and sketch ideas for Mallory's wedding cake!
xoxo,
Rachel
Pin It
Tuesday, March 20, 2012
Fresh Start
Happy first day of spring! It seems very appropriate that I begin writing again today. SO MUCH has changed since my last post, allow me to bring you up to speed.
I have to mention that Christmas, although it feels like ages ago, was AWESOME. I got my fondant crimpers! A definite highlight was my golden 26th birthday, complete with high school friends, family, Mr. Scott and his family, dulce de leche cupcakes, and ruckus games of Pictionary and Wits and Wagers. To have all of my favorite people in one room was the best gift ever.
Of course, upon my return to Minnesota, shit got real again. The bakery was in a downward spiral, and I was ready to abort. Within about two weeks of job searching, I landed a decorating position at Queen of Cakes. This 8-year-old specialty cake shop in Edina, MN, produces over 100 cakes a week, and projects to book about 500 weddings this year. My prayers were answered for a job that took me out of the pastry chef/manager role and into one that let me go back to just decorating and building my strengths artistically. On top of that, I was instantly enamored with the owner, Terri. I am eager to learn as much as possible from her, and her kind heart is as apparent as her skills.
That being said, it was instantly challenging for me to switch from decorating predominantly with chocolate and fondant, to a traditional, all buttercream style. I've been practicing one way of doing things for 7 years now, but this was exactly what I wanted: A new outlook and new skills. {QOC does use fondant and other decorating materials other than buttercream, just not on the majority of their orders.}
My free-hand drawing was atrocious in the beginning, but I am improving, thanks to the "cheater" methods I've learned. These may seem elementary to some, but I really was never exposed to these before! One is the Piping Gel Transfer. Much like how I would trace an image with chocolate before, here you trace it, again on parchement paper, with piping gel. The paper is placed gel-side down on the cake, leaving lines to guide you in your design. You can read a little more about it here. We also have a projector, that allows one to project any image on the top of a cake and easily adjust the size to fit. We trace the lines with a toothpick and pipe the design accordingly.
This dragon cake is an example of where I used the projector to position the image on the cake and traced the outlines to fill in. The details are free-handed over the top.

One more trick I had never heard of was using a make-up powder puff to flatten a piped buttercream design. The powder puff is dipped in powdered sugar to avoid sticking, and then used to pat down, say, raised dots and lines, the body of the dragon above, or to blend away flaws in your base coat.
See how the dots are flat in this picture?

Airbrushing was something I had done a few times at Fresh Fields, but never had formal training with. Its actually quite fun! You can create some really neat effects, and I can't wait to get better at it. The trick is to dilute your colors with rum and blend thin layers rather than heavy ones.
My first airbrush sunset!

And there is so much more! Buttercream flowers (tricky little bastards), figure piping (making people gives me a panic attack), the UMBA conference coverage, and some super exciting news about my new partnership with Premier Food Products!
Even though I don't feel completely "settled in" to this new job yet, I am looking forward to three months from now when I don't feel like the new girl and I'm more comfortable with these new techniques. I'm excited to go to work again, and that, my friends, is priceless.
Love,
Rachel
I have to mention that Christmas, although it feels like ages ago, was AWESOME. I got my fondant crimpers! A definite highlight was my golden 26th birthday, complete with high school friends, family, Mr. Scott and his family, dulce de leche cupcakes, and ruckus games of Pictionary and Wits and Wagers. To have all of my favorite people in one room was the best gift ever.
Of course, upon my return to Minnesota, shit got real again. The bakery was in a downward spiral, and I was ready to abort. Within about two weeks of job searching, I landed a decorating position at Queen of Cakes. This 8-year-old specialty cake shop in Edina, MN, produces over 100 cakes a week, and projects to book about 500 weddings this year. My prayers were answered for a job that took me out of the pastry chef/manager role and into one that let me go back to just decorating and building my strengths artistically. On top of that, I was instantly enamored with the owner, Terri. I am eager to learn as much as possible from her, and her kind heart is as apparent as her skills.
That being said, it was instantly challenging for me to switch from decorating predominantly with chocolate and fondant, to a traditional, all buttercream style. I've been practicing one way of doing things for 7 years now, but this was exactly what I wanted: A new outlook and new skills. {QOC does use fondant and other decorating materials other than buttercream, just not on the majority of their orders.}
My free-hand drawing was atrocious in the beginning, but I am improving, thanks to the "cheater" methods I've learned. These may seem elementary to some, but I really was never exposed to these before! One is the Piping Gel Transfer. Much like how I would trace an image with chocolate before, here you trace it, again on parchement paper, with piping gel. The paper is placed gel-side down on the cake, leaving lines to guide you in your design. You can read a little more about it here. We also have a projector, that allows one to project any image on the top of a cake and easily adjust the size to fit. We trace the lines with a toothpick and pipe the design accordingly.
This dragon cake is an example of where I used the projector to position the image on the cake and traced the outlines to fill in. The details are free-handed over the top.
One more trick I had never heard of was using a make-up powder puff to flatten a piped buttercream design. The powder puff is dipped in powdered sugar to avoid sticking, and then used to pat down, say, raised dots and lines, the body of the dragon above, or to blend away flaws in your base coat.
See how the dots are flat in this picture?
Airbrushing was something I had done a few times at Fresh Fields, but never had formal training with. Its actually quite fun! You can create some really neat effects, and I can't wait to get better at it. The trick is to dilute your colors with rum and blend thin layers rather than heavy ones.
My first airbrush sunset!
And there is so much more! Buttercream flowers (tricky little bastards), figure piping (making people gives me a panic attack), the UMBA conference coverage, and some super exciting news about my new partnership with Premier Food Products!
Even though I don't feel completely "settled in" to this new job yet, I am looking forward to three months from now when I don't feel like the new girl and I'm more comfortable with these new techniques. I'm excited to go to work again, and that, my friends, is priceless.
Love,
Rachel
Thursday, December 8, 2011
All I Want For Christmas is A Fondant Crimper
In the spirit of the season, I present a list of pastry tools I would love to add to my collection. You may think my talent only comes from my wee little midget hands, but having the right tools in one's arsenal can increase efficiency and help create looks midget hands alone just can't achieve.
For example, this Fondant Crimper Tool Set:

These funny looking do-dads are used to create pretty scalloped edges on cakes like this one here. So cool, right?!
 |
| Cake by The Caketress |
 |
| Cake by The Caketress |
This Number Cutter Set would be handy for poignant birthday cakes. I have a set of letter cutters I snagged at a garage sale for one dollar and I can't imagine life without them!


I have some sculpting tools, but this complete set would be handy for adding details to sculpted people, flowers, and creating textures on fondant.

Looking ahead to the future, when I have my own business and money grows on trees, I'm eager to being a collection of cake stands. Right now isn't the best time (small apartment, no storage, often moving, clumsy cats), but I can dream {and I do it quite well}.
 |
| Via Fancy Flours |
 |
| Via Fancy Flours |
 |
| Via Classic Hostess |
 |
| Source unknown |
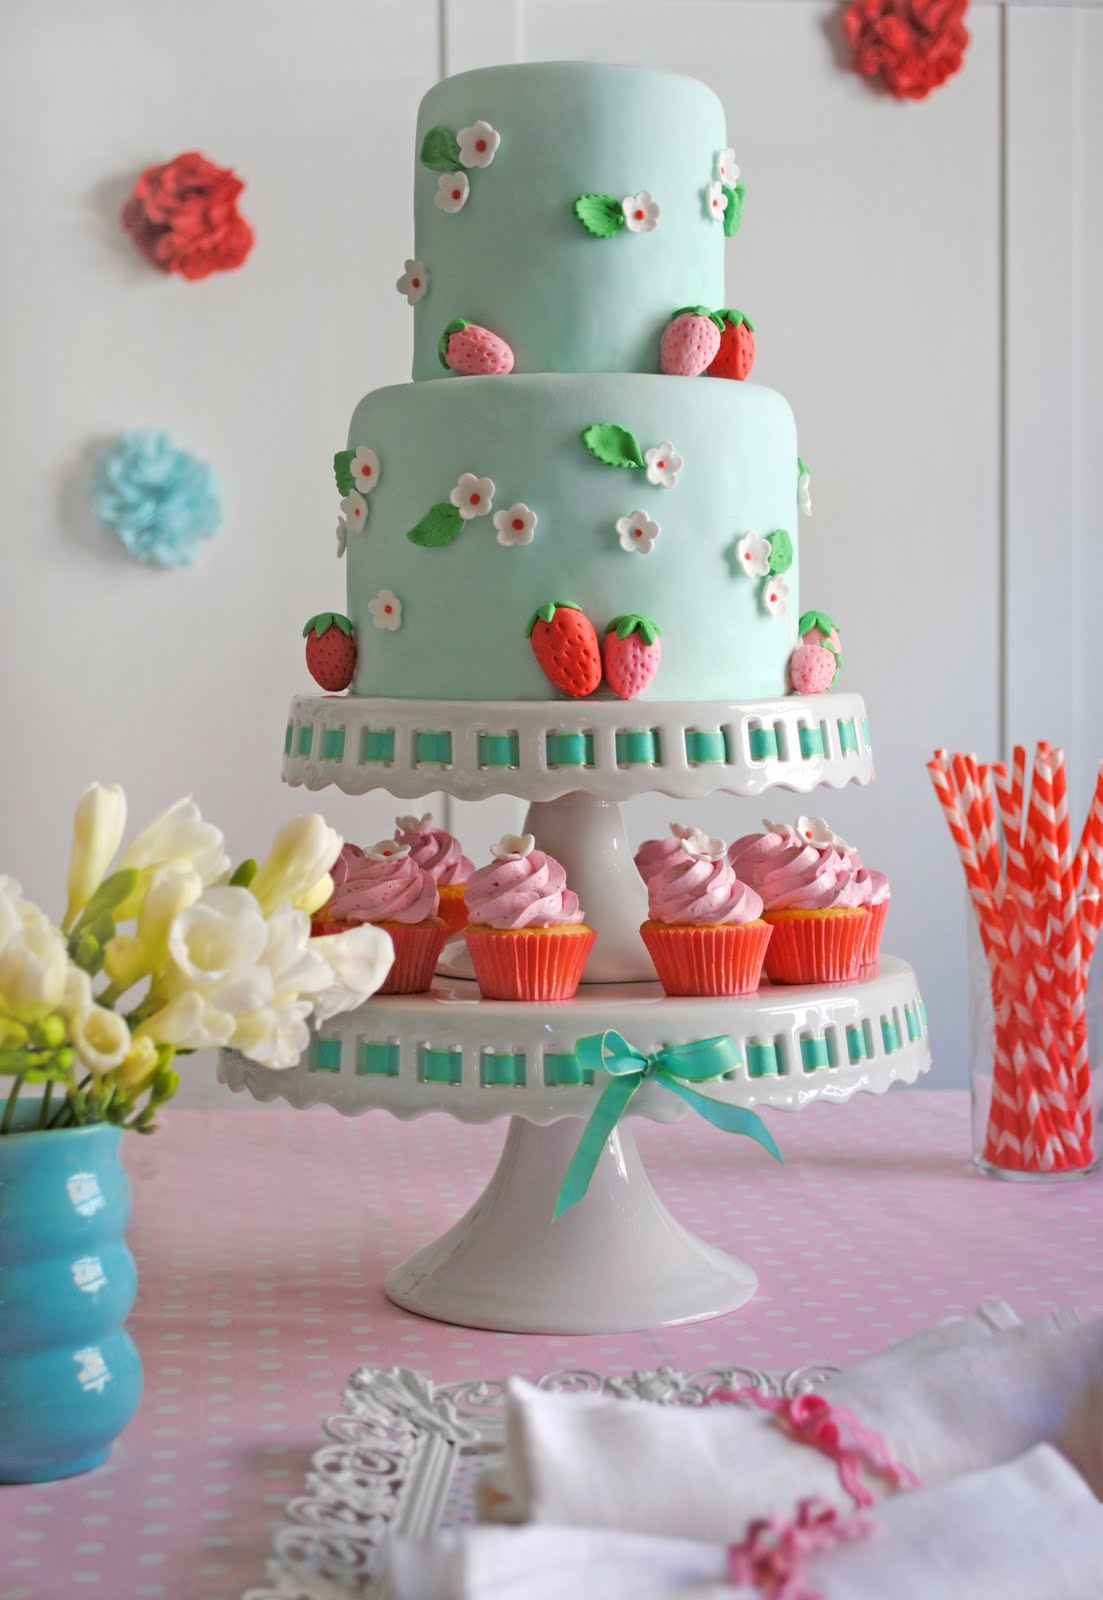 |
| Source unknown, found on The Sweetest Occasion blog |
 |
| Source unknown |
I could go on and on with those!
With the business of the season, I hope everyone is finding quiet moments to remember the true meaning of Christmas and you are able to enjoy it with the ones you hold near and dear to your heart. Cats included.
Love,
Rachel
Tuesday, October 18, 2011
Fit for a Princess
Anyhoo!!!
I was able to find pictures of Rapunzel's tower on the internet, and also research prior attempts at this cake to find out what was going to work best. Of course I wanted the cake to look better than any of them, with my own details and flourishes. As always, I wanted to keep the cake as "edible" as possible. In my internet searching, there were some really amazing and elaborate versions, but inside there was more styrofoam, pipes, and rice crispy treats than cake! My philosophy is and always will be, "This is first and foremost a CAKE that people should want to eat."
 |
| Movie still. |
 | |
| Movie poster from the French version was the best one I could find for some reason.... |
 |
| My messy little workspace. |
 |
| I worked on the tower upside-down to keep what would become the platform for the house flat. I used four 12" Wilton dowel tubes, taped together and wrapped with fondant to create the tower (I applied individual "rocks" over this for texture and definition). The exposed white part went down into the cake for added stability. |
 | |||
| The finished roof, a cone of cardboard covered with foil. Shingles were applied with white chocolate. |
 |
| I tinted some clear glaze blue to make the windows look glassy, and I really dig the "watercolor" look. The skewers were for support during delivery as the tower was pretty top heavy. |
 | |
| The dew drops is more clear glaze piped into droplets. You can't tell from the photo, but the hair is brushed with gold luster dust for a shimmery effect. |

 |
| It was hard to fit this whole thing in one picture! It was easily 2 feet tall if not more. |

I only wish you could see more of the cobblestone stem of the tower, since it did take me a flippin' hour to cover it. I would have liked to add the additional wing of the house (you may notice there are two spires in the movie still), but for the sake of stability, I wasn't sure how to add it without the whole thing tilting to one side. Had the house itself been smaller, this might have worked better. Next time!!!
Needless to say, little Princess Alexa LOVED the cake. Unfortunately, they did complain about finding a hair on it. BAHAHAHA, just kidding :)
Love,
Rach
Subscribe to:
Posts (Atom)